AspectJ Development Environment Support for Borland JBuilder
Name
AspectJ Development Environment Support for Borland JBuilder — provide support for AspectJ in Borland's JBuilder integrated development environmentOverview
AspectJ Development Environment (AJDE) support for JBuilder is an extension to Borland's JBuilder. It will allow you to
Current Release
The AspectJ Development environment has been rewritten for AspectJ 1.0 alpha 1. This documentation is targeted at the 0.8beta4 release but much of it still applies to the current release.
Installation
Key Improvements
The "AspectJ Structure View" replaces JBuilder's structure view instead of being launched in a separate window.
AJDE can be toggled on/off with the "AJ" button--when it is turned off all of the menus, resources, and event listeners that it uses will be removed.
Projects no longer require the manual adding of the "aspectjrt.jar" libarary.
Key Concepts
Known Bugs & Limitations
There is no compiler progress dialog--the way to tell if the compile is finished is to watch the "status" area of the main window.
The structure view is not persistent between IDE launches--you must compile to view the structure for a program.
The debugger has not seen much use and it's stability and performance is limited.
IDE Window and AspectJ Structure View
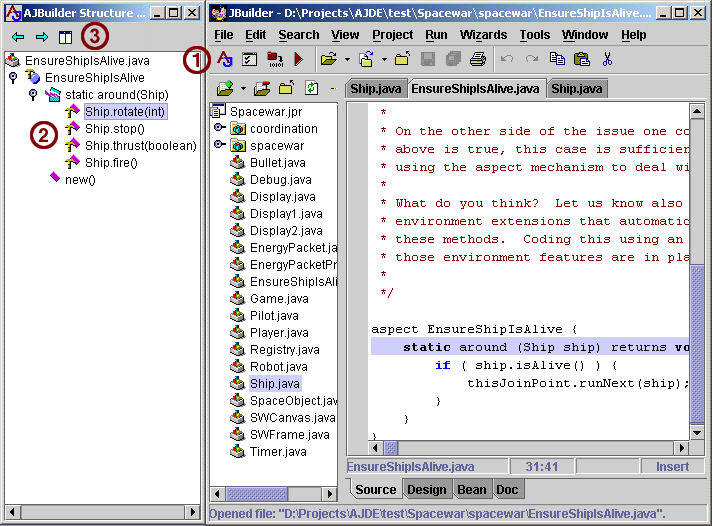
The following figure demonstrates a typical view of AspectJ Support for JBuilder running:

This button launches the AspectJ Support for AspectJ Console
The Structure View showing the structure for the currently selected class
The Structure View displays the structure of the AspectJ program; here we see that the "static around(Ship)" advice action affects 4 different methods on the "Ship" class. To navigate to these methods simply double click their entries in the tree.
Since navigating the Structure View can cause you to jump between files internet browser style "forward" and "back" buttons are provided
The auto-arrange button will tile the JBuilder window with the Structure View window
AspectJ Console (JBuilder 3.5)
This pane allows you to select the files that will be passed to the compiler
This pane displays the compile command passed to ajc as well as the corresponding output
the "Debug.java" has been removed from the current configuration. Once "OK" is clicked that file will no longer be passed to the compiler.
Setting up, Compiling, and Running Spacewar in JBuilder 4
To set up the examples/spacewar example (available for download at the bottom of the Download Page) you can use the following steps as a guideline, or use the "New AJDE Project..." Wizard.
Step 1: set up Spacewar as a JBuilder project

Step 2: adding "aspectjrt.jar" as a project library
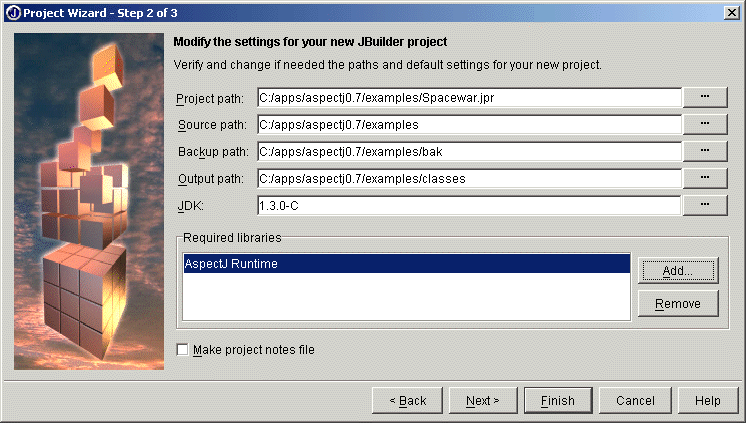
In the "Project wizard - Step 2 of 3" window under "Required Libraries" select "Add".
When the "Select One or More Libraries" dialog comes up click "New...".
In the "New Library Wizard" create the "AspectJ Runtime" library using your corresponding "jbuilder4/lib/ext/aspectjrt.jar" path by clicking the "Add" button.


Step 3: adding sources to your project

Step 4: setting up the build configuration and compiling
When the compile finishes, click "AspectJ Run" in the "Tools" menu.
If you have not selected a class to run, you will be prompted to do so: click "OK" in the prompt dialog.
In the "Project Properties" dialog that pops up select the "Run" tab.
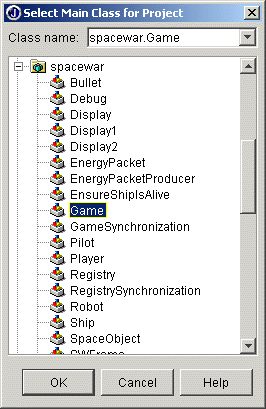
open up the "spacewar" package, select "Game" and click "OK".

Setting up, Compiling, and Running in JBuilder 3.5
To set up the examples/spacewar example (available for download at the bottom of the Download Page) you can use the following steps as a guideline:
type "Spacewar.jpr" into the dialog box to save the project file in that directory (note, since the Spacewar example uses both the "spacewar" and "coordination" packages the project is set up in the root examples directory) and click "Save" to close the "New Project File" dialog box
set the "Output path" entry to be the directory where you want your classes to go
in the "Source" tab select the entry and click "Edit" (by default JBuilder will set this directory to be "examples/src" which does not exist)
once the "Select a path" dialog appears simply click "OK" since this will select the "examples" directory
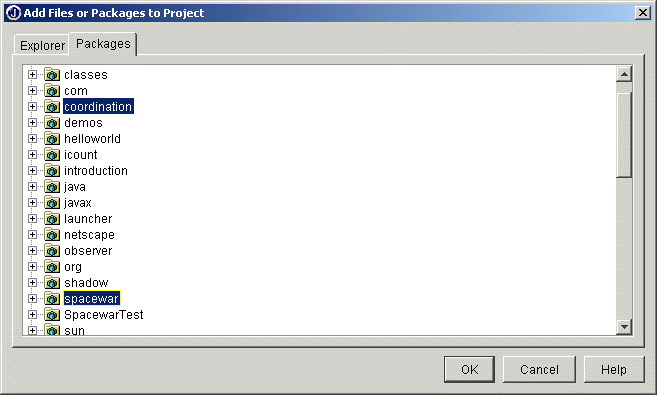
in the leftmost pane you will notice "Spacewar.jpr", right click this and select "Add to project" in the popup, then "Add class/package..." in the next popup
<cntrl> click "spacewar" and "coordination" and then click "OK"; this will add the two packages to your project
open the AspectJ Support for JBuilder Console
you can remove "Debug.java" (this aspect adds considerable overhead to the compile) by clicking it, then click "OK" to save the build configuration and close the console
open the Structure View to browse the structure of the program
if you have not selected a class to run, you will be prompted to do so: click "OK" in the prompt dialog, then
in the "Project Properties" dialog that pops up select the "Run" tab
open up the "spacewar" package, select "Game" and click "OK"
